Imagine capturing the beauty and essence of an orange tabby cat on paper, bringing it to life through your own artistic touch. In this step-by-step guide, we will take you through the process of drawing an orange tabby cat, from the initial sketch to the final details. Whether you are a seasoned artist or just beginning your creative journey, this guide will provide you with the techniques and tips needed to create a stunning and realistic depiction of this beloved feline. So grab your pencil, let your imagination run wild, and let’s embark on this artistic adventure together.

Materials Needed
To draw an orange tabby cat, you will need a few basic materials. These include:
Pencil
A pencil will be your main tool for sketching and outlining the cat. You can choose any pencil that you are comfortable using, whether it’s a graphite pencil or a mechanical pencil.
Paper
A blank sheet of paper will serve as your canvas for drawing the orange tabby cat. You can use any type of paper that you prefer, whether it’s a sketchbook or loose sheets.
Eraser
An eraser is essential for corrections and adjustments as you draw. Make sure you have a good quality eraser that won’t smudge or damage your drawing.
Colored pencils or markers
To add color to your orange tabby cat, you will need colored pencils or markers. Choose shades that closely match the colors of an orange tabby cat’s fur, such as different shades of orange, brown, and black.
Reference Image
Before you start drawing, it is helpful to have a clear photo of an orange tabby cat as a reference. This will serve as a guide for your drawing and help you capture the cat’s features accurately. You can find reference images online or use a book or magazine with cat pictures. Ensure that the image is clear and detailed for easier replication.
Finding a clear photo
When searching for a reference photo, try to find one that is well-lit and shows the cat from the desired angle. Make sure the photo captures the important details of an orange tabby cat, such as its facial features, fur patterns, and body proportions.
Printing or displaying the reference image
Once you have found a suitable reference photo, you can choose to either print it out or display it on a screen. If you prefer working with a physical reference, printing the image is a great option. Alternatively, you can display the photo on a computer, tablet, or smartphone screen while you draw.
Basic Shapes
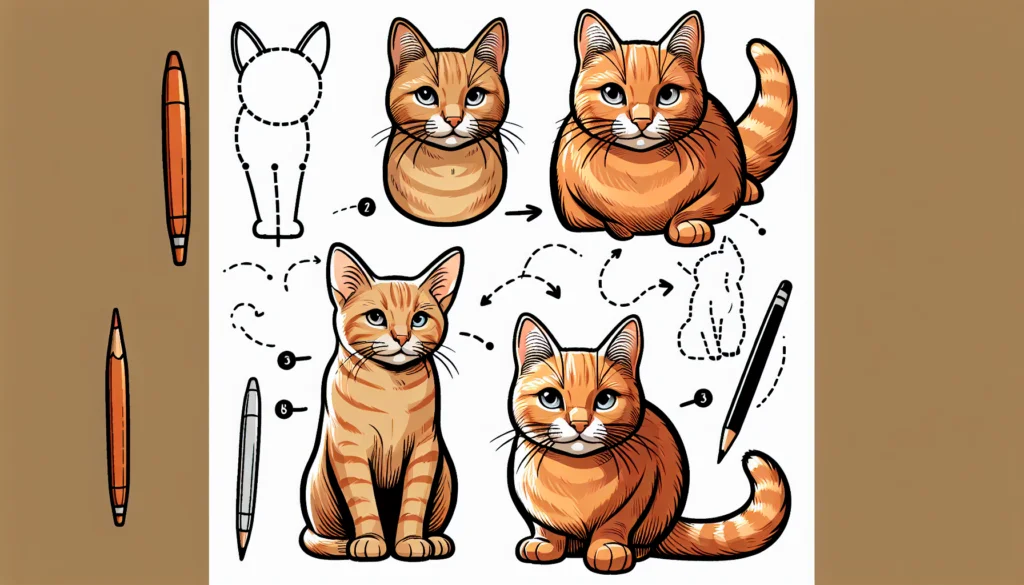
Before diving into the details, it’s important to establish the basic shapes that will form the foundation of your orange tabby cat drawing. These basic shapes serve as guidelines and help you achieve the correct proportions and overall shape of the cat.
Drawing a circle for the head
Start by sketching a circle in the center of your paper. This circle will represent the cat’s head. It doesn’t need to be a perfect circle, so don’t worry if it’s slightly uneven.
Sketching an oval for the body
Below the head, draw an oval shape to represent the body of the cat. This oval should be slightly elongated and narrower than the head.
Adding cylinders for the legs
Next, add four small cylinders sticking out from the body. These will serve as the cat’s legs. Make sure to position them proportionally, with two cylinders on each side of the body.
Creating triangles for the ears
At the top of the head, sketch two triangle shapes pointing upwards. These triangles will represent the cat’s ears. Position them slightly tilted and make sure they are equal in size.
Forming a long, curved tail
Finally, draw a long and curved line extending from the back end of the body. This line represents the cat’s tail. You can make the tail as long or as short as you like, depending on your artistic preference.
Facial Features
Once you have established the basic shapes, it’s time to add the cat’s facial features. These features bring the drawing to life and give the cat its unique expression and personality.
Placing the eyes
Start by drawing two almond-shaped eyes within the head. Position them in the upper part of the circle, spacing them evenly apart. Pay attention to the reference image to accurately depict the eye shape and size. Add small circles or ovals inside each eye to represent the pupils.
Adding the nose
Below the eyes, draw a small triangle shape to represent the cat’s nose. Place it in the center of the head, slightly above the bottom edge of the circle. Add small lines on the sides of the triangle to indicate the nostrils.
Drawing the mouth
Extend a gentle curved line downwards from the nose, shaping it into a smile or a half-open mouth, depending on the expression you want to convey. You can also add a small line above the mouth to indicate the cat’s upper lip.
Creating the whiskers
To complete the facial features, draw several short lines on each side of the nose. These lines represent the cat’s whiskers. Angle them slightly upwards and outwards to give a realistic appearance.

Fur Details
Now that you have the basic structure and facial features in place, it’s time to add some fur details to your orange tabby cat drawing. This will make the cat more realistic and emphasize its unique fur patterns.
Defining the fur direction
Observe the reference image and the cat’s fur direction. Most tabby cats have fur that flows from the top of the head towards the body. Use short, curved lines that follow this direction to add fur texture to your drawing. Start from the top of the head and gradually work your way down, using light strokes.
Adding fur texture
To give the cat’s fur more texture and depth, use your pencil to add small lines and strokes throughout the body. These lines can be denser in some areas, such as the neck and back, to mimic the thicker fur on an orange tabby cat. Vary the length and direction of the lines to create a realistic effect.
Emphasizing the stripes
Orange tabby cats are known for their distinctive stripes. Use thin, curved lines to add these stripes to your drawing. Observe the reference image to determine the placement and direction of the stripes. Make sure to follow the contours of the cat’s body and keep the lines consistent in thickness.
Coloring the Cat
With the basic structure, facial features, and fur details in place, it’s time to add color to your orange tabby cat drawing. This will bring your artwork to life and showcase the vibrant shades of an orange tabby cat’s fur.
Choosing the base color
Start by selecting an appropriate color for the cat’s base coat. Shades of orange, brown, or tan work well for an orange tabby cat. Apply this base color lightly and evenly across the cat’s body using colored pencils or markers. Make sure to leave the white areas, such as the chest and paws, untouched for now.
Shading and highlighting
To create dimension and depth in your drawing, add shading and highlighting to the cat’s fur. Observe the reference image to determine the areas that are darker or lighter in color. Use a slightly darker shade to add shadows in the areas that are naturally shaded, such as the underside of the body, the creases, and the areas between the legs. Blend the shading smoothly with the base color to achieve a realistic effect.
Next, use a lighter shade of your base color to add highlights to the areas that catch the light, such as the top of the head, the cheeks, and the back. Apply this lighter shade sparingly, using gentle strokes to create a soft and natural-looking effect.
Adding color to the eyes
To make the eyes stand out, use colored pencils or markers to add color to the pupils and irises. Observe the reference image to determine the appropriate eye color for your orange tabby cat. Typically, shades of green or yellow work well. Carefully apply the color, leaving a small white highlight in the eyes to mimic the reflection of light.
Coloring the stripes
Finally, use a darker shade of orange or brown to color the stripes on the cat’s body. Apply this color in thin, curved lines to match the existing pencil lines you drew earlier. Use a light touch and gradually build up the color to achieve the desired intensity.
Background
Now that your orange tabby cat is beautifully colored, you may want to consider adding a background to your drawing. The background can help set the scene and add context to your artwork.
Deciding on a background
Think about the mood and environment you want to portray in your drawing. Are you envisioning the cat in a cozy home setting, a vibrant outdoor scene, or a simple plain background? Consider the colors and elements that will complement and enhance your orange tabby cat drawing.
Drawing a simple background
If you prefer a minimalistic or clean look, you can simply leave the background blank or add a subtle pattern or texture. This allows the focus to remain on the cat itself.
Creating a more detailed scene
For those who want to create a more immersive scene, consider adding elements that relate to the cat’s environment. This could include a window with a view, a cozy bed or cat tree, or even other objects like books or toys. Take your time to carefully plan and sketch these elements before proceeding with coloring.
Final Touches
Now that your orange tabby cat drawing is almost complete, it’s time to add some final touches to enhance its overall appearance and give it a polished look.
Cleaning up the lines
Go over your pencil lines with a clean eraser, removing any visible guidelines or smudges. This will tidy up your drawing and make it easier to see your finished product.
Adding depth and dimension
To make your cat appear more three-dimensional, consider adding shading and highlights to specific areas using colored pencils or markers. This can be particularly effective on the body, face, and tail. Blend the colors smoothly to achieve a realistic and natural texture.
Signing and dating the artwork
As a proud artist, don’t forget to sign your finished artwork. Add your signature in a discreet location, such as the lower corner of the drawing. You can also include the date to commemorate completing this creative endeavor.
Practice and Experiment
Drawing an orange tabby cat is a wonderful accomplishment, but don’t stop there! Take this opportunity to continue practicing and exploring your artistic abilities.
Continuing to sketch tabby cats
Keep challenging yourself by sketching more orange tabby cats. Experiment with different poses, angles, and expressions. You’ll gradually develop a deeper understanding of the cat’s anatomy and will be able to capture their unique personalities more effectively.
Exploring different poses and angles
Expand your skills by exploring different poses and angles for your orange tabby cats. Trying various perspectives will allow you to see the cat from different viewpoints and can lead to more dynamic and interesting compositions.
Experimenting with different art mediums
While colored pencils and markers are commonly used for cat drawings, don’t be afraid to try different art mediums. Experiment with watercolors, acrylics, or even digital art tools to explore different techniques and styles. Each medium offers its own unique qualities and can bring a fresh perspective to your artwork.
Conclusion
Congratulations on completing your orange tabby cat drawing! Take a moment to celebrate your artistic achievement and the progress you’ve made. Remember, every drawing is an opportunity for growth and learning. Keep practicing, exploring, and embracing your creativity. Happy drawing!

